Before you cook
Background Recipe story & origin
The smash burger's roots stretch back to the classic American diner culture of the 1950s and 60s, where short-order cooks working flat-top griddles discovered that aggressively pressing a loosely packed ball of beef onto a ripping-hot surface created a crust unlike anything a traditional thick patty could achieve. This wasn't a refined culinary technique—it was born from practicality, speed, and the instinctive knowledge that more surface contact meant more flavor. Those sizzling griddles in roadside diners from Kentucky to California were quietly perfecting what food science would later explain as the Maillard reaction: the browning of proteins and sugars that creates hundreds of complex flavor compounds.nnWhile the technique itself is old, the smash burger was formally codified and given its name by Smashburger, the chain founded in Denver, Colorado in 2007 by Tom Ryan and Rick Schaden. But the concept truly entered the cultural spotlight through Steak 'n Shake, the Midwest chain that had been smashing patties since its founding in Normal, Illinois in 1934—long before anyone called it a 'smash burger.' Their thin, lacy-edged patties served on soft buns became the blueprint that modern smash burger enthusiasts would later celebrate and obsess over.nnBy the 2010s and into the 2020s, the smash burger experienced a full-blown renaissance, driven by food bloggers, YouTube channels, and a generation of home cooks who discovered that a cast-iron skillet and a sturdy spatula could replicate—or even surpass—what fast food chains had been doing for decades. The emphasis shifted to quality beef (an 80/20 fat ratio became gospel), American cheese melted to gooey perfection, and soft potato buns that could hold everything together without overpowering the star of the show. Today, the smash burger stands as one of the defining American comfort foods, a testament to the idea that the simplest techniques, executed with precision and heat, produce the most satisfying results.
Before you start Equipment you'll need
- Cast iron skillet or heavy flat griddle — Provides high, even heat distribution essential for creating the crispy, caramelized crust characteristic of smash burgers
- Heavy metal spatula or burger press — Applies firm, even pressure to smash patties flat against the hot surface, maximizing contact for optimal crust development
- Parchment paper (cut into small squares) — Prevents raw patties from sticking to work surface and makes handling easier before cooking
- Small mixing bowl — Combines ground beef with seasonings evenly before forming patties
- Sharp knife and cutting board — For dicing onions or preparing toppings efficiently
- Kitchen thermometer — Verifies internal temperature (160°F for well-done) to ensure food safety without overcooking
Safety Safety & allergen notes
- Cast iron skillet reaches smoking hot temperatures - use pot holders or heat-resistant gloves when handling and keep hands away from steam
- Hot oil can splatter when beef balls contact the griddle - stand back and never lean over the pan during initial placement
- Keep fingers clear when smashing patties - use a burger press or heavy spatula with firm downward pressure to avoid hand contact with hot surface
- Ground beef must reach 160°F internal temperature for food safety - use a meat thermometer to verify doneness if uncertain
- Parchment paper can catch fire at very high heat - monitor closely and remove immediately after smashing to prevent charring
Non-negotiables Rules for success
-
Do not pack or compress beef balls when forming them
Loose, gently formed balls allow the meat to spread evenly and develop a thin, crispy crust when smashed; packed meat compresses into dense, tough patties
-
Heat griddle until smoking hot and use high heat throughout cooking
Extremely high heat creates the Maillard reaction needed for a deeply browned, crispy crust; lower heat causes the meat to steam and become gray and bland
-
Smash immediately after placing beef balls on the griddle and hold pressure for 10 seconds
Immediate smashing maximizes contact with the hot surface for crust development; waiting allows the meat to cook before flattening, preventing proper browning
-
Season the top of patties after smashing, not before
Salt draws out moisture from the meat surface; seasoning after smashing allows the exposed meat to brown properly without excess moisture interfering with crust formation
-
Cook patties undisturbed until edges are deeply browned and crispy before flipping
Moving patties breaks the developing crust and prevents proper browning; undisturbed cooking allows the flavorful crust to form completely
-
Flip using a thin metal spatula and scrape up all crust from the pan
A thin spatula gets under the crust cleanly without breaking it; scraping captures all the flavorful browned bits that add depth to the burger
-
Serve assembled burgers immediately after assembly
Warm patties and toasted buns begin to cool and soften within minutes; serving immediately preserves the contrast between crispy crust and juicy interior
Prep Get set first
About 8 min of prep
- Cast iron skillet or heavy flat griddle ready
- Heavy metal spatula or burger press accessible
- Parchment paper cut into small squares
- Small mixing bowl for sauce
- Sharp knife and cutting board
- Ground beef portioned into 8 loose balls (3 oz each)
- Onion sliced into rings
- Tomato sliced into 4 rounds
- Lettuce and pickle chips prepped and ready
- American cheese slices separated
- Burger buns at hand
- All condiments (mayo, mustard, ketchup, pickle brine) measured
This recipe requires 20-25 minutes active cooking time with high heat and quick assembly, so have everything prepped and within arm's reach before you start.
Ingredients
Instructions
Unlock Grouped Step Actions
Plus members get tap-to-check action steps and live ingredient swaps for this recipe.
-
Make the smash sauce
Combine mayonnaise, mustard, ketchup, and pickle brine in a small bowl. Stir well and set aside.
-
Prepare vegetables
Thinly slice onion into rings and slice tomato into 4 rounds. Set aside with lettuce and pickle chips.
-
Form beef balls
Divide ground beef into 8 equal loose balls, approximately 3 oz each. Do not pack or compress them — keeping them loose is critical for a good smash.
-
Heat griddle
Heat cast iron skillet or heavy flat griddle over high heat until smoking hot. Add neutral oil and swirl to coat.
-
Smash first batch of patties
Place 2 beef balls into the skillet, spacing them apart. Immediately cover each with parchment paper and press down firmly with heavy spatula or burger press, smashing into thin patties 4 to 5 inches wide. Hold pressure for 10 seconds.
-
Cook first batch
Season top of each patty generously with salt and pepper. Cook undisturbed until edges are deeply browned and crispy.
-
Flip and cheese first batch
Flip each patty using thin metal spatula, scraping up all crust from pan. Immediately place one slice of American cheese on each patty. Cook until cheese is melted.
-
Cook second batch
Repeat smashing, cooking, and cheesing process with remaining beef balls.
-
Toast buns
Lightly toast burger bun halves cut-side down in same skillet until golden.
-
Assemble burgers
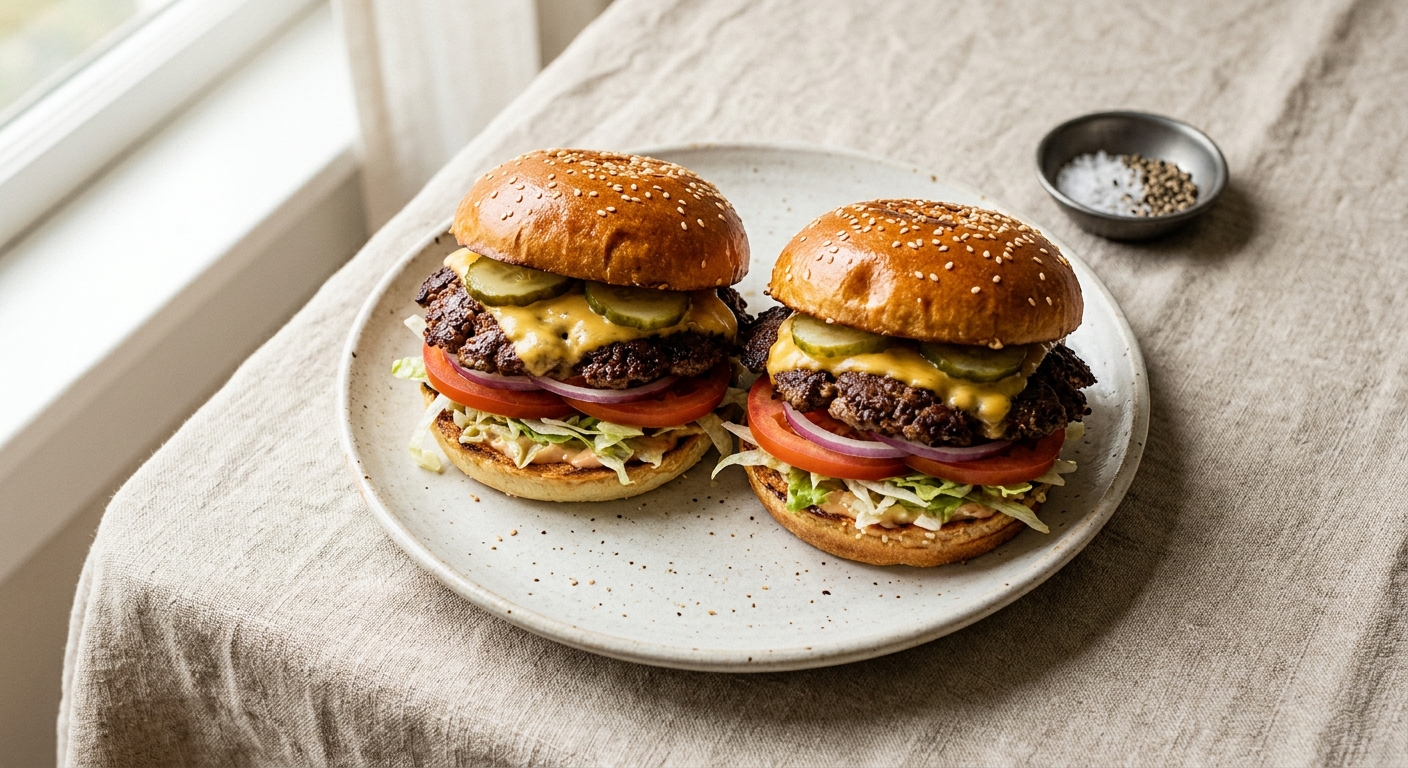
Spread smash sauce on both top and bottom buns. Stack two cheese-covered patties on bottom bun, then layer with onion rings, pickle chips, lettuce, and tomato. Place top bun on and serve immediately.
Chef's notes
Smash burgers are best eaten immediately — the crust softens as they sit, so do not assemble until ready to serve.
For a smash burger bar, set out toppings and sauce separately and let guests assemble their own.
If cooking for a larger group, work in batches of 2 patties at a time to avoid crowding the pan and dropping the temperature.