Before you cook
Background Recipe story & origin
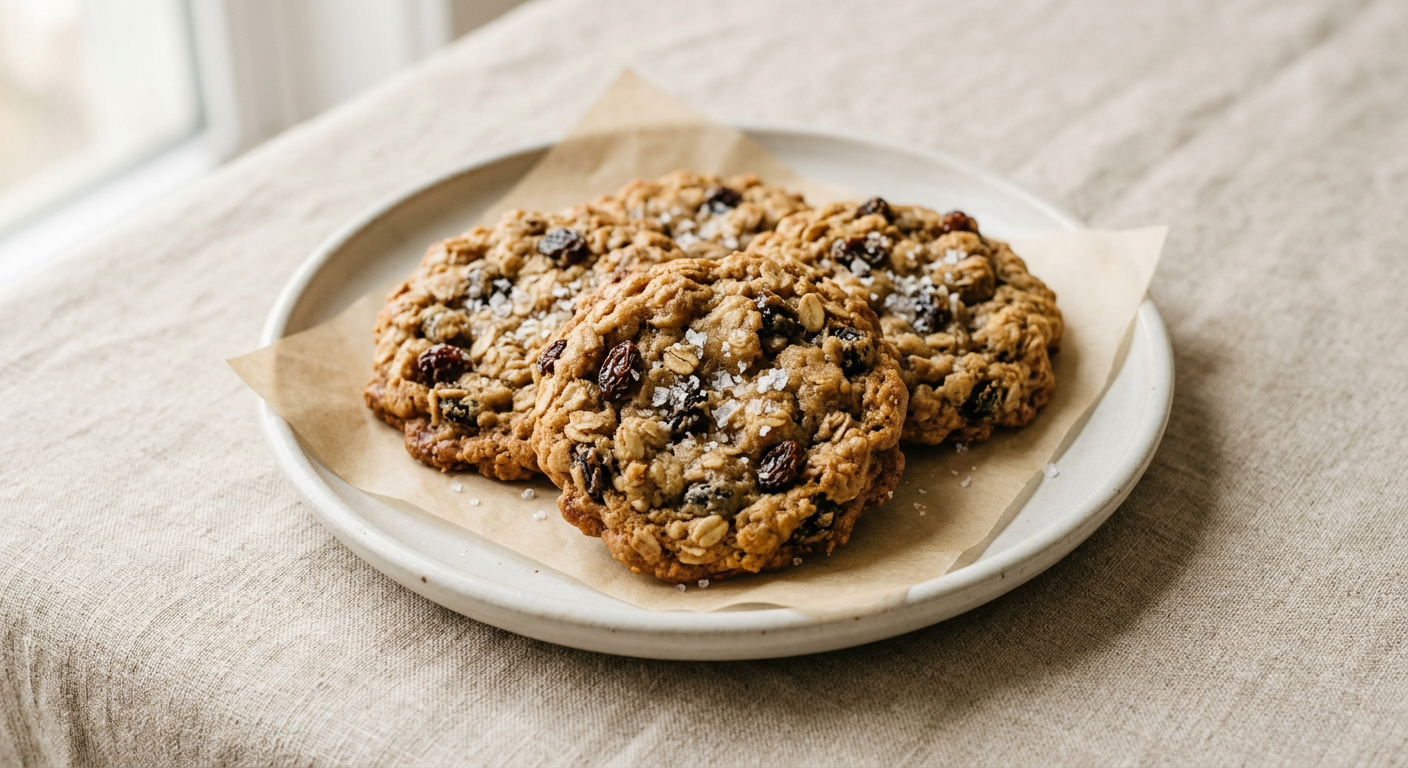
Oatmeal cookies have roots stretching back to 19th-century Scotland and England, where oats were a fundamental crop and primary carbohydrate source for working-class families. The combination of oats, dried fruit, and butter created an affordable, shelf-stable treat that could sustain laborers and travelers. As Scottish and Irish immigrants arrived in America during the 1800s, they brought their oatmeal baking traditions with them, and the cookies gradually became woven into American culinary culture.nnThe addition of raisins to oatmeal cookies came as dried fruit became more accessible through global trade routes in the late 1800s and early 1900s. American bakeries and home cooks embraced this variation, and by the mid-20th century, oatmeal raisin cookies had become a standard offering in bakeries and cookie jars across the country. However, the recipe remained relatively straightforward—simply combining rolled oats, butter, sugar, eggs, raisins, and spices.nnThe modern gourmet elevation of oatmeal raisin cookies, featuring brown butter and sea salt, represents a 21st-century trend toward sophisticated comfort food. Brown butter, with its nutty, caramelized flavor, transforms the cookie from ordinary to extraordinary, while fleur de sel or other finishing salts enhance the sweetness and add complexity. This contemporary twist honors the cookie's humble origins while appealing to modern palates seeking elevated versions of classic treats, turning a working-class staple into a refined indulgence.
Before you start Equipment you'll need
- Light-colored saucepan — Essential for browning butter while monitoring color changes; light color allows you to see when butter reaches golden-brown stage without burning
- Large mixing bowl — Provides adequate space for creaming butter and sugar, then mixing in all dry ingredients without overflow
- Electric mixer — Efficiently creams butter and sugar to incorporate air for tender cookies; saves time and effort
- Medium bowl — Allows you to whisk together dry ingredients (flour, oats, baking soda, salt) separately before combining with wet ingredients
- Whisk — Evenly combines dry ingredients and distributes leavening agent throughout for consistent rise
- Wooden spoon or spatula — Heat-resistant tool for folding in oats and raisins without deflating the dough
- Baking sheets — Provides even heat distribution for uniform cookie browning and baking
- Parchment paper — Prevents cookies from sticking and promotes even browning on the bottom
- Cookie scoop or tablespoon — Ensures uniform cookie sizes for consistent baking times and presentation
- Wire cooling rack — Allows air circulation around hot cookies to prevent them from becoming soggy on the bottom
Safety Safety & allergen notes
- Watch browned butter constantly to prevent burning - it can go from golden to burnt in seconds
- Browned butter is extremely hot - use pot holders when pouring into bowl and keep hands and face away from steam
- Oven racks and baking sheets reach 350°F - use oven mitts when placing or removing cookie sheets to prevent burns
- Remove cookies from oven with oven mitts - immediately sprinkle sea salt while hot to avoid burns from the baking sheet
Non-negotiables Rules for success
-
Brown butter over medium heat, stirring frequently, until golden brown and nutty (5-7 minutes)
High heat causes butter to scorch and burn, creating bitter flavor; low heat prevents proper browning and nutty flavor development
-
Cool browned butter to warm (not hot) before creaming with sugars
Hot butter can cook eggs when added later and prevents proper emulsification; cooling ensures smooth, creamy texture
-
Mix wet and dry ingredients on low speed just until combined
Overmixing develops gluten, creating tough, dense cookies instead of tender and chewy
-
Chill dough for at least 30 minutes before baking
Chilled dough spreads less during baking, resulting in thicker cookies with better texture and preventing them from becoming too thin and crispy
-
Bake until edges are golden but centers look slightly underdone
Cookies continue to cook on the hot baking sheet after removal; removing them slightly underdone prevents overbaking and ensures chewy centers
Prep Get set first
About 8 min of prep
- Gather all ingredients and measure them out
- Set up light-colored saucepan for browning butter
- Get large mixing bowl ready
- Have electric mixer accessible
- Prepare medium bowl and whisk for dry ingredients
- Line baking sheets with parchment paper
- Get cookie scoop or tablespoon ready
- Have wire cooling rack nearby
- Keep wooden spoon or spatula handy
- Ensure flaky sea salt is accessible for finishing
Plan for about 25-30 minutes of active prep and mixing, plus 30 minutes minimum dough chilling and 15 minutes baking and cooling per batch.
Ingredients
Instructions
Unlock Grouped Step Actions
Plus members get tap-to-check action steps and live ingredient swaps for this recipe.
-
Brown the butter
Melt butter in a light-colored saucepan over medium heat, stirring frequently until it turns golden brown and smells nutty, about 5 to 7 minutes. Watch carefully to prevent burning.
-
Cool the browned butter
Pour the browned butter into a large mixing bowl and let it cool for 10 minutes until warm but not hot.
-
Cream butter and sugars
Add both sugars to the browned butter and beat with an electric mixer on medium speed until well combined, about 2 minutes.
-
Add eggs and vanilla
Beat in the eggs one at a time, then add the vanilla extract and mix until smooth.
-
Mix the dry ingredients
In a separate bowl, whisk together the flour, baking soda, cinnamon, and salt.
-
Combine wet and dry ingredients
Add the dry ingredients to the butter mixture and mix on low speed just until combined.
-
Fold in oats and raisins
Stir in the oats and raisins with a wooden spoon or spatula until evenly distributed.
-
Chill the dough
Cover the dough and refrigerate for at least 30 minutes or up to 2 days for best results.
-
Preheat oven and prepare baking sheets
Preheat the oven to 350°F and line baking sheets with parchment paper.
-
Portion the cookies
Scoop 2–3 tablespoons of dough per cookie and place them 2 inches apart on the prepared baking sheets.
-
Bake the cookies
Bake for 10 to 12 minutes until the edges are golden but the centers still look slightly underdone.
-
Finish with flaky sea salt
Remove from the oven and immediately sprinkle each cookie with a small pinch of flaky sea salt.
-
Cool the cookies
Let cookies cool on the baking sheet for 5 minutes before transferring to a wire rack to cool completely.
Chef's notes
Add a vanilla or cream cheese frosting for extra flavor
Store cookies in an airtight container at room temperature for up to 5 days
For chewier cookies, slightly underbake; for crispier cookies, bake an additional 1 to 2 minutes
You can substitute dried cranberries or chopped dates for the raisins if desired
Cookie dough can be scooped into balls and refrigerated up to 2 days before baking