Before you cook
Background Recipe story & origin
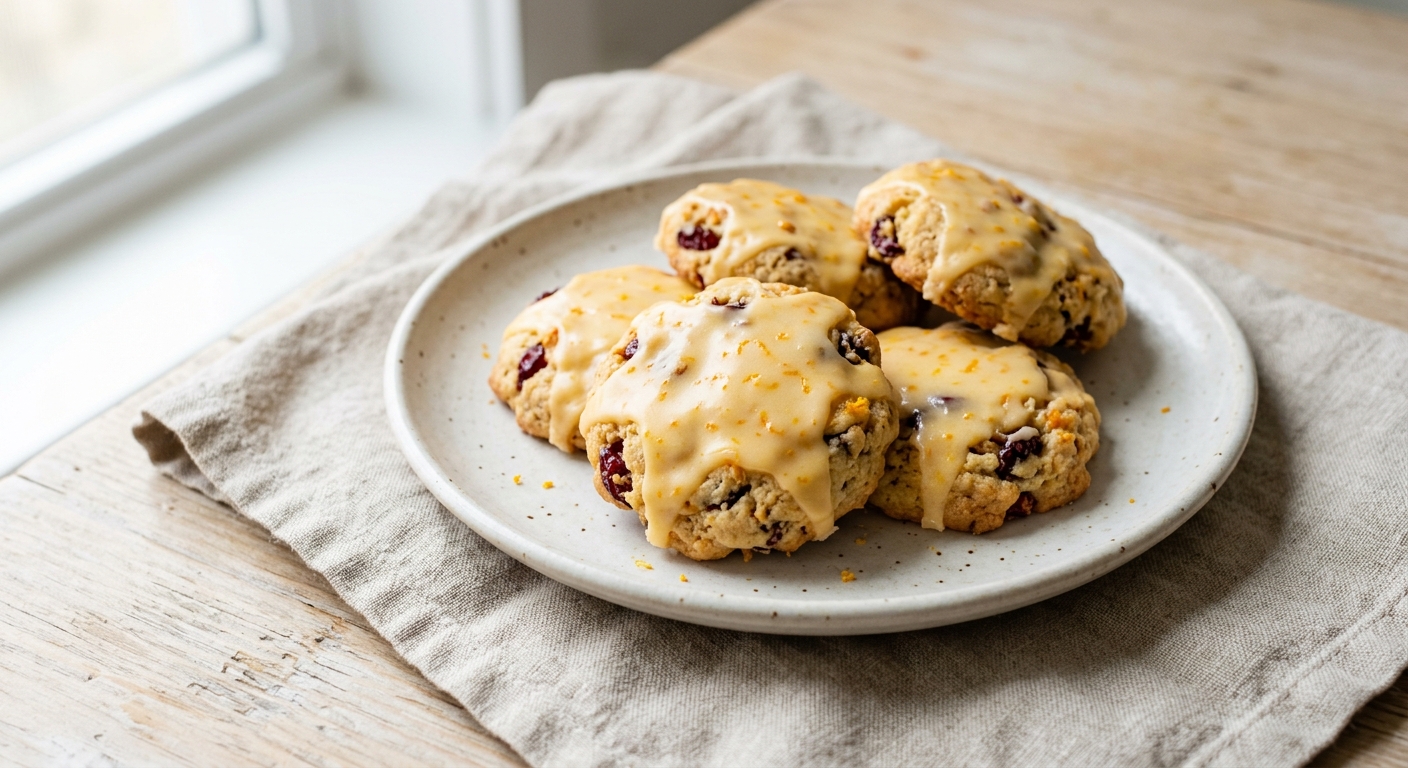
The cranberry is one of the few fruits truly native to North America, cultivated by Indigenous peoples of the Northeast long before European settlers arrived. Native Americans used cranberries medicinally, as a dye, and as a food source, mixing them with dried meat and fat to create pemmican. When European colonists encountered the tart red berry, they quickly adopted it into their cooking, and by the 1800s, cranberry cultivation had become a significant industry in Massachusetts, New Jersey, and Wisconsin. The pairing of cranberries with oranges came naturally, as the bright citrus notes balance the berry's sharp acidity in a way that feels almost destined.nnThe rise of the drop cookie in American baking during the early-to-mid 20th century created the perfect vehicle for this flavor combination. As refrigeration improved and citrus fruits became more affordable and widely available across the country, home bakers began experimenting with orange zest and juice to brighten their holiday cookie recipes. Cranberry orange quick breads and muffins had already become holiday staples by the 1950s and 60s, and the flavor profile made an easy and natural leap into cookie form. Women's magazines and community cookbooks of the era were filled with festive variations, and the combination became firmly associated with Thanksgiving and Christmas baking.nnThe addition of a sweet orange glaze or icing elevated the cookie from a simple drop cookie to a more elegant holiday confection. This finishing touch became popular as home bakers sought ways to make their treats look as special as they tasted, borrowing the icing technique from classic sugar cookies and applying it to the cranberry orange base. Today, Cranberry Orange Cookies are a beloved staple of holiday cookie exchanges and gift tins across America, celebrated for their jewel-like appearance, bright flavor, and the way they capture the essence of winter's best seasonal ingredients.
Before you start Equipment you'll need
- Two large baking sheets — Provides adequate space to bake cookies in batches without crowding, ensuring even browning
- Parchment paper — Prevents cookies from sticking and ensures even browning on the bottom
- Large mixing bowl — Provides enough space to cream butter and sugar, then mix in dry ingredients
- Medium mixing bowl — Used for whisking together dry ingredients (flour, baking powder, salt) before combining
- Hand mixer or stand mixer — Efficiently creams butter and sugar to incorporate air, essential for proper cookie texture
- Rubber spatula or wooden spoon — Scrapes down bowl sides and folds in cranberries and orange zest without deflating mixture
- Whisk — Aerates and combines dry ingredients evenly for consistent leavening
- Microplane or fine grater — Zests orange skin finely to release oils and prevent bitter white pith in dough
- Citrus juicer — Extracts fresh orange juice efficiently for both dough and icing with minimal pulp
- Tablespoon or cookie scoop — Portions dough uniformly for consistent cookie size and baking time
- Wire cooling rack — Allows air circulation around cookies to cool evenly and prevent soggy bottoms
- Small bowl — Holds orange icing separately for easy application and prevents mixing with dough
Safety Safety & allergen notes
- Oven preheated to 375°F - use oven mitts when placing or removing baking sheets to prevent burns
- Baking sheets and cookies are extremely hot when removed from oven - allow to cool on pan for 5 minutes before handling
- Keep hands and face away from mixer when it is running to avoid contact with rotating beaters
- Hot baking sheets can cause severe burns - use pot holders or oven mitts for all handling
Non-negotiables Rules for success
-
Use room-temperature butter when creaming with sugars
Cold butter won't incorporate smoothly and won't trap air properly, resulting in dense cookies instead of light and fluffy texture
-
Cream butter and sugars for 2-3 minutes until light and fluffy
This process incorporates air into the dough, which helps cookies rise and creates a tender crumb structure
-
Add eggs one at a time and beat well after each addition
This ensures proper emulsification of the wet and dry ingredients, preventing a separated or curdled batter
-
Mix flour mixture on low speed and stop as soon as dry streaks disappear—do not overmix
Overmixing develops gluten, making cookies tough and dense instead of tender and chewy
-
Bake only until edges are golden but centers look slightly underdone
Cookies continue to cook on the hot pan after removal; underbaking prevents them from becoming hard and dry
-
Cool cookies on the pan for 5 minutes before transferring to wire rack
This allows the cookies to set enough to handle without breaking, while the residual heat finishes cooking the centers
-
Ice cookies only after they are completely cool
Warm cookies will melt the icing and cause it to run off instead of setting properly on top
Prep Get set first
About 8 min of prep
- Line two baking sheets with parchment paper
- Gather all ingredients and measure them out
- Have both mixing bowls ready (large and medium)
- Set up hand/stand mixer
- Zest oranges and juice them (need 5 tablespoons total juice + 2 tablespoons zest)
- Place butter at room temperature on counter
- Have spatula, whisk, and cookie scoop within reach
- Position wire cooling rack nearby
- Preheat oven to 375°F
This recipe requires about 25 minutes of active mixing and prep before baking, plus 12 minutes in the oven and 20+ minutes for cooling and icing.
Ingredients
Instructions
Unlock Grouped Step Actions
Plus members get tap-to-check action steps and live ingredient swaps for this recipe.
-
Preheat oven and prepare baking sheets
Preheat your oven to 375°F (190°C) and line two baking sheets with parchment paper.
-
Mix dry ingredients
In a medium bowl, whisk together the all-purpose flour, baking soda, and salt. Set aside.
-
Cream butter and sugars
In a large bowl, beat the room-temperature butter with the granulated sugar and brown sugar using a hand mixer or stand mixer on medium speed for 2 to 3 minutes, until the mixture is light and fluffy.
-
Add eggs and flavorings
Add the eggs one at a time to the butter mixture, beating well after each addition. Mix in the vanilla extract, 2 tablespoons of orange juice, and 1 tablespoon of orange zest until combined.
-
Incorporate flour mixture
Reduce the mixer to low speed and gradually add the flour mixture, mixing just until no dry streaks remain. Do not overmix.
-
Add cranberries
Fold in the dried cranberries using a spatula or wooden spoon until evenly distributed throughout the dough.
-
Portion cookie dough
Drop rounded tablespoons of dough onto the prepared baking sheets, spacing them about 2 inches apart.
-
Bake cookies
Bake for 10 to 12 minutes, until the edges are lightly golden but the centers still look slightly underdone. The cookies will firm up as they cool.
-
Cool cookies
Remove the baking sheets from the oven and let the cookies cool on the pan for 5 minutes before transferring them to a wire rack to cool completely.
-
Make orange icing
While the cookies cool, make the icing by whisking together the powdered sugar, 3 tablespoons of orange juice, and 1 teaspoon of orange zest in a small bowl until smooth. The icing should be thick but drizzleable. Add more orange juice one teaspoon at a time if it is too thick.
-
Ice and finish cookies
Once the cookies are completely cool, drizzle or spoon the orange icing over the tops. Allow the icing to set for 15 to 20 minutes before stacking or storing.
Chef's notes
Store cookies in an airtight container at room temperature for up to 5 days. Place parchment paper between layers to prevent sticking.
Cookie dough can be made ahead and refrigerated for up to 48 hours before baking. Let it sit at room temperature for 10 minutes before scooping.
One large navel orange typically provides enough zest and juice for both the cookies and the icing.